The Original BioShock game was released in 2007 but a new, HD version, was released in 2016 titled BioShock Remastered and it will bring one of the most original shooters of its time to your screens looking better than ever. However, plenty of users complained that they are almost unable to play the game because of the constant crashes they experience.

This is a big problem but, luckily, other players managed to resolve it using the methods presented below. Good luck and make sure you follow the instructions carefully.
What Causes BioShock Remastered to Crash on Windows?
The game can crash for a wide variety of different problems. We have created a shortlist of all possible causes for you to check out. Determining the correct cause can help you resolve the problem more easily so make sure you check it out!
- Lacking administrator permissions – Some games require that their main executable has administrator permissions so make sure you provide them to resolve the problem.
- Steam Overlay – Steam Overlay is generally known to cause issues with quite a few games and BioShock games are incompatible with this feature. Try disabling it to resolve the problem.
- CPU cores – Sometimes the game struggles when trying to run the game’s engine on multiple CPU cores. This can be resolved by editing the configuration file.
- DirectX 10 incompatibility – Users have reported not being able to run the game on DirectX 10. Make sure you try using the DirectX 9 version.
- Overclocking – If you are constantly struggling with BioShock Remastered crashing on Windows, you should try to stop overclocking your GPU, CPU, or memory.
Solution 1: Run the Game as an Administrator
Providing administrator permissions to the game’s executable seems to have resolved the problem from many users. It worked for crashes which have appeared since day one and it still works with the newer versions of the game. Make sure you follow the steps below to run BioShock Remastered as an administrator.
- Locate the game’s installation folder manually by right-clicking the game’s shortcut on Desktop or anywhere else and choose Open file location from the menu.
- If you have installed the game via Steam, open its shortcut on the Desktop or by searching for it in the Start menu simply by typing “Steam” after clicking the Start menu button.

- After the Steam client opens, navigate to the Library tab in the Steam window at the menu located at the top of the window, and locate the BioShock Remastered entry in the list.
- Right-click the game’s icon in the library and choose the Properties option from the context menu which will open and make sure you navigate to the Local Files tab in the Properties window straight away and click the Browse Local Files.

- Locate the BioShock Remastered executable file in the BioShock Remastered folder. Right-click on it and choose the Properties option from the context menu which will appear.
- Navigate to the Compatibility tab in the Properties window and check the box next to the Run this program as an administrator option before saving the changes by clicking OK or Apply.

- Make sure you confirm any prompts which may appear which should prompt you to confirm the choice with admin privileges and the game should launch with admin privileges from the next startup. Check to see if the game still crashes!
Solution 2: Disable Steam Overlay
There is something about Steam Overlay which makes BioShock simply want to crash. It’s a strange problem as this overlay is sometimes quite useful for in-game features but you might want to consider disabling it for this game only. It causes it to crash for some users who have purchased and installed the game through Steam.
- Open Steam by double-clicking its entry on the Desktop or by searching for it in the Start menu. Windows 10 OS users can also search for it using Cortana or the search bar, both of them next to the Start menu at the left part of your taskbar!

- Navigate to the Library tab in the Steam window, and locate BioShock Remastered in the list of the games you own in your library.
- Right-click the game’s entry in the library and choose the Properties option from the context menu which should appear. Stay in the General tab in the Properties window and clear the box next to the “Enable the Steam Overlay while in-game” entry.

- Apply the changes, exit, and try running the game. Check to see if BioShock Remastered still crashes after launching or during gameplay.

Solution 3: Edit the Configuration File (Crash on Save)
If the problem appears when you are trying to save the game, there is a line inside the BioShock Remastered configuration file which should help you resolve the crashing problem. It’s related to the number of CPU cores the game’s engine should use. Users have reported that decreasing the number from the default one managed to resolve their issue.
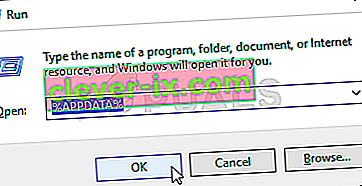
- Press the Windows Logo Key + R button combination to bring up the Run dialog box. Make sure you type “%appdata%” in the dialog box and click OK in order to open this location in File Explorer.
- Instead of that, you can also open the File Explorer on your computer (opening a folder) and navigate to the folder manually. First of all, locate This PC at the right navigation screen after opening File Explorer and click your Local Disk.
- Navigate to Users >> AppData. If you are unable to see the AppData folder, the reason is that the folder is hidden by default and you are unable to see it without changing a certain setting in File Explorer.
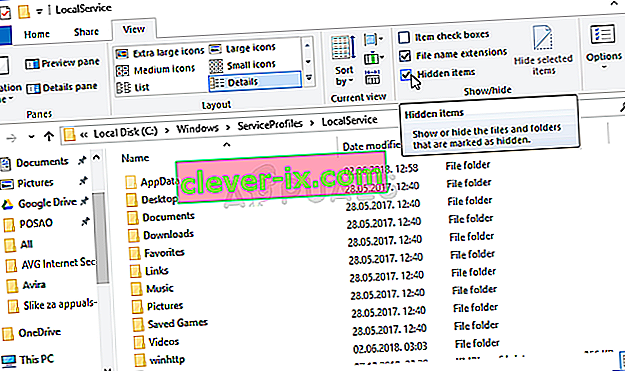
- Click on the “View” tab on File Explorer’s menu and click on the “Hidden items” checkbox in the Show/hide section. File Explorer will now be able to show the AppData folder so double-click to open it. Open the Roaming folder.
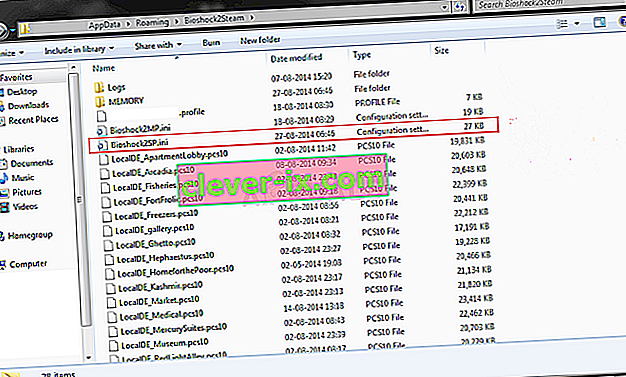
- Locate a folder named BioshockHD and open the Bioshock folder inside. Open it by double-clicking, and try to locate a file called “BioshockSP.ini”. Double-click to open the file and choose to open it with Notepad if Notepad isn’t launched automatically.
- Use the Ctrl + F key combination or click Edit at the top menu and select the Find option from the dropdown menu to open the search box.
- Type “HavokNumThreads” in the box and change the value next to it from the default one to half the size of it. For example, if it was 4, change it to 2.. Use the Ctrl + S key combination in order to save the changes or click File >> Save and exit Notepad.
- Try running the game again in order to check if BioShock Remastered keeps crashing on startup after performing these steps.


Alternative: There is a similar method that has helped users get rid of the crashes. Look for the “texturestreamingmemorylimit” line in the .ini file and change it to match the VRAM of your graphics card (e.g. 6 GB card >> 6144.000000). Look for “texturestreamingdistancelimit” and set it to 10000.000000.
Solution 4: Stop Overclocking
The error often appears when users overclock their GPUs or CPUs. Overclocking is a thing where users alter the maximum frequency of the graphics of the central processor to a value which is above the recommended one set by your GPU’s manufacturer. This can give your PC a significant performance and speed advantage when playing video games and improve it in all ways.
Returning your processor’s frequency to its original state depends on which software you used to overclock it in the first place. Stop overlocking your GPU and CPU and check to see if the crashing issue persists.
Solution 5: Run the Game Using DirectX 9
This is definitely one of the most popular methods among all of them available online as it appears that the game was simply not made to be fully compatible with DX10. This is a shame but you can easily revert these changes if you have downloaded the game via Steam. Follow the steps below in order to force the game to use DirectX9 instead of 10!
- Open up Steam on your computer by double-clicking its entry on the Desktop or by searching for it in the Start menu. Windows 10 users can also search for it using Cortana or the search bar, both of them next to the Start menu.
- Navigate to the Library tab in the Steam window by locating the Library tab at the top of the window, and locate BioShock Remastered in the list of games you have in your respective library.
- Right-click on the game’s icon in the list and choose the Properties option from the context menu which will show up. Stay in the General tab in the Properties window and click the Set launch options button.
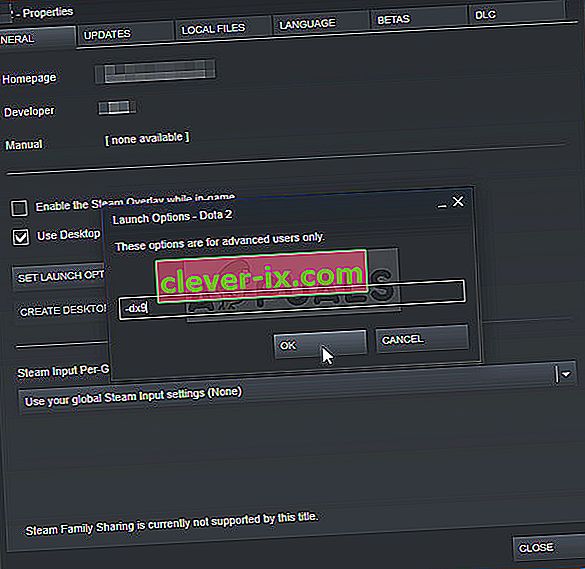
- Type “-dx9” in the bar. If there were some other options located there you are possibly using, make sure you separate this one with a coma. Click the Ok button in order to confirm the changes.
- Try launching BioShock Remastered from the Library tab and check to see if the game crashes occur as often as they did before.

Solution 6: Updating Windows to the Latest Build
Another thing to try if none of the above methods don’t work is to update Windows to the latest build. There are numerous instances where if the Windows itself isn’t updated, there are some modules that are missing that in turn cause the game to crash. This goes for outdated Windows as well.
- Press Windows + R, type “update” in the dialogue box, and open the Windows Update module.
- Now, click on Check for updates option present and wait for Windows to search for any updates available.
- After the update is done, restart your computer and check if the issue is resolved for good.

Solution 7: Enabling Stereo Mix
Stereo Mix allows you to record exactly what was being output to your speakers, without going through any analog/digital conversion. This is a very core module in the Windows operating system that many games use for their operation or saving purposes even if you are not recording audio. There were several feedbacks from users where they reported that enabling this fixed the problem for them.
- Press Windows + R, type “control” in the dialogue box, and press Enter.
- Once in the control panel, navigate to Hardware and Sound and then Manage Audio Devices.
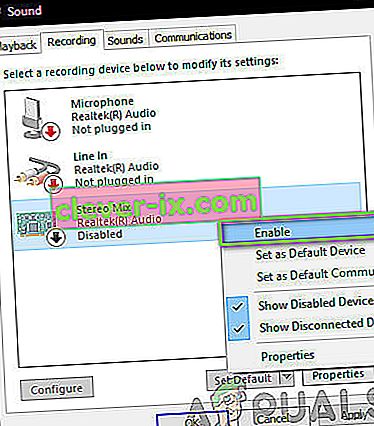
- Now navigate to the Recording tab. Right-click on any empty space and select Show disabled devices.
- When Stereo Mix comes forward, right-click on it and select Enable.
- Save changes and exit. Restart your computer and check if the issue is resolved for good.

If all the above methods don’t work, you can try a workaround in Steam.


