So beheben Sie die & lsquo; Unbehandelte Ausnahme ist in Ihrer Anwendung aufgetreten & rsquo; Fehler unter Windows?
Der Fehler " Eine nicht behandelte win32-Ausnahme ist in * Anwendungsname * aufgetreten " tritt normalerweise auf, wenn der Benutzer versucht, eine in Visual Studio erstellte Anwendung zu starten. Die meisten gemeldeten Fälle dieses Fehlers hängen mit Uplay, Internet Explorer und mehreren Legacy-Spielen zusammen, die ursprünglich für ältere Windows-Versionen entwickelt wurden.

Hinweis : So beheben Sie eine Laufzeitbibliothek in Bezug auf Visual C ++.
Was verursacht den Fehler "Nicht behandelte Ausnahme ist in Ihrer Anwendung aufgetreten" unter Windows?
Es gibt mehrere einfache Ursachen für dieses Problem, und das Problem kann effektiv behoben werden, wenn Sie Ihr Szenario anhand der Ermittlung der richtigen Ursache erkennen können. Schauen Sie sich die Liste unten an:
- Möglicherweise ist Ihr Antivirenprogramm der Schuldige. Einige Antiviren-Tools wie Panda Antivirus haben dieses Problem bekanntermaßen verursacht. Stellen Sie daher sicher, dass Sie sie ersetzen.
- Bestimmte Programme oder Malware werden möglicherweise ausgeführt. Wenn auf Ihrem Computer ein installiertes Programm oder eine installierte Malware ausgeführt wird, möchten Sie diese möglicherweise entfernen. Stellen Sie sicher, dass Sie einen sauberen Start starten, um festzustellen, ob dies die richtige Ursache ist.
- Microsoft .NET Framework-Installation ist beschädigt - Wenn die Kerndateien beschädigt sind, können Sie entweder versuchen, die Installation zu reparieren, eine neuere Version zu installieren oder einen SFC-Scan durchzuführen.
- Das Debuggen von Skripten wird über die Registrierung aktiviert. Wie sich herausstellt, kann ein bestimmter Registrierungsschlüssel zur Entstehung dieses Problems beitragen. Um dies zu beheben, müssen Sie das Skript-Debugging über Registrierungsschlüssel deaktivieren.
- Zugriffsverletzung in Msvcr92.dll - Ein überschreitender Quellpuffer oder ein falsches Endbyte sind ebenfalls mögliche Ursachen für dieses Problem. Um sie zu beheben, müssen Sie jedes ausstehende Windows-Update installieren.
- Löschen des Registrierungsschlüssels für den Ubisoft-Launcher - Wenn dieser Fehler beim Starten von Uplay.exe auftritt, liegt ein Fehler im Ubisoft Game Launcher vor. Dieses Problem kann auch über die Registrierung behoben werden, indem der zu diesem Launcher gehörende Wert gelöscht wird.
- Beschädigung der Systemdatei - Eine Inkonsistenz der Systemdatei kann dieses Problem ebenfalls verursachen. Leichte Beschädigungen können durch einfache DISM- und SFC-Scans behoben werden. Unter schwerwiegenderen Umständen sollte eine Neuinstallation oder Reparaturinstallation Ihnen bei der Lösung des Problems helfen.
Lösung 1: Installieren Sie jedes ausstehende Windows Update
Eine der häufigsten Ursachen, die den Fehler " Eine nicht behandelte Win32-Ausnahme ist aufgetreten " verursacht, ist eine Anwendung, die für die x64-Plattform mit der MSVCR90.DLL erstellt wurde und schließlich die Funktion strncpy aufruft.
In diesem Fall führt eine in der Datei Msvcr92.DLL ausgelöste Zugriffsverletzung höchstwahrscheinlich dazu, dass die Anwendung in der Funktion strncpy nicht mehr reagiert. Ein übersteigender Quellpuffer oder ein falsches Endbyte sind die wahrscheinlichsten Ursachen für dieses Problem.
Glücklicherweise ist Microsoft dieses Problem bereits bekannt und hat einen Hotfix für dieses Problem veröffentlicht, mit dem es automatisch behoben wird. Um dies zu nutzen, müssen Sie lediglich Ihre Betriebssystemversion auf die neueste verfügbare Version aktualisieren.
Hinweis: Dieser Hotfix wurde in einer Version von Visual Studio 2008 veröffentlicht, die Windows automatisch aktualisiert. Die folgenden Schritte sind daher universell und sollten unabhängig von Ihrer Betriebssystemversion funktionieren.
Hier ist eine Kurzanleitung zum Aktualisieren Ihres Windows-Builds auf die neueste Version, um den Hotfix für Visual Studio 2008 zu installieren und das Problem zu beheben:
- Drücken Sie die Windows-Taste + R , um ein Dialogfeld Ausführen zu öffnen . Geben Sie als Nächstes 'ms-settings: windowsupdate' ein und drücken Sie die Eingabetaste , um die Registerkarte Windows Update der App Einstellungen zu öffnen .

Hinweis: Falls dieses Problem unter Windows 7 oder Windows 8.1 auftritt. Verwenden Sie stattdessen den Befehl 'wuapp' .
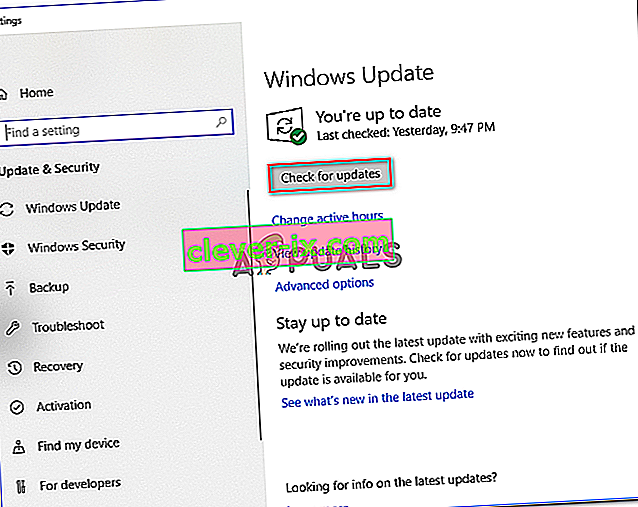
- Nachdem Sie den Windows Update-Bildschirm aufgerufen haben, klicken Sie zunächst auf Nach Updates suchen . Befolgen Sie dann die Anweisungen auf dem Bildschirm, um die Installation aller Windows Updates abzuschließen, die derzeit auf die Installation warten.
Hinweis: Beachten Sie, dass es wichtig ist, dass Sie jedes Update installieren, nicht nur die kritischen. Da der Hotfix in einer Revision von Visual Studio enthalten ist, finden Sie das betreffende Update möglicherweise unter Optional. Stellen Sie daher sicher, dass Sie alle installieren.
- Falls Sie aufgefordert werden, einen Neustart durchzuführen, bevor Sie die Möglichkeit haben, jedes verfügbare Update zu installieren, tun Sie dies. Stellen Sie jedoch sicher, dass Sie nach dem nächsten Start zum selben Bildschirm zurückkehren, um die Installation der restlichen Updates abzuschließen.
- Starten Sie Ihren Computer nach der Installation jedes ausstehenden Updates ein letztes Mal neu und wiederholen Sie die Aktion, die zuvor die Fehlermeldung verursacht hat, um festzustellen, ob das Problem behoben ist.


Falls immer noch der Fehler " Eine nicht behandelte Win32-Ausnahme ist aufgetreten " auftritt , fahren Sie mit der folgenden Methode fort.
Lösung 2: Ersetzen Sie Ihr Antivirus
Kostenlose Antiviren-Tools können sehr hilfreich sein und ihren Computer schützen, aber manchmal verstehen sie sich einfach nicht gut mit anderen Dingen auf Ihrem Computer. Erwägen Sie, Ihr Antivirenprogramm zu ersetzen, wenn es dieses Problem verursacht, während es eingeschaltet ist!
- Klicken Sie auf das Startmenü und öffnen Sie die Systemsteuerung, indem Sie danach suchen. Alternativ können Sie auf das Zahnradsymbol klicken, um die Einstellungen zu öffnen, wenn Sie Windows 10 verwenden.
- Wählen Sie in der Systemsteuerung oben rechts die Option Als - Kategorie anzeigen aus und klicken Sie im Abschnitt Programme auf Programm deinstallieren.

- Wenn Sie die App Einstellungen verwenden, sollte durch Klicken auf Apps sofort eine Liste aller auf Ihrem PC installierten Programme geöffnet werden.
- Suchen Sie Ihr Antiviren-Tool in der Systemsteuerung oder in den Einstellungen und klicken Sie auf Deinstallieren .
- Der Deinstallationsassistent sollte geöffnet sein. Befolgen Sie daher die Anweisungen, um ihn zu deinstallieren.

- Klicken Sie auf Fertig stellen, wenn das Deinstallationsprogramm den Vorgang abgeschlossen hat, und starten Sie Ihren Computer neu, um festzustellen, ob weiterhin Fehler auftreten. Stellen Sie sicher, dass Sie eine bessere Antivirenoption auswählen .
Lösung 3: Löschen des Launcher-Registrierungswerts (falls zutreffend)
Wenn beim Versuch, Uplay.exe oder eine andere Anwendung von Ubisoft zu starten, der Fehler " Eine nicht behandelte Win32-Ausnahme ist aufgetreten " auftritt, liegt dies höchstwahrscheinlich an einem Fehler im Ubisoft Game Launcher.
Wie sich herausstellt, scheint dies unter Windows 10 ein weit verbreitetes Problem zu sein, insbesondere bei Benutzern, auf denen Steam und Uplay gleichzeitig installiert sind.
Mehrere betroffene Benutzer, bei denen wir Probleme haben, dieses Problem zu beheben, haben es geschafft, es mithilfe des Registrierungseditors zu beheben, um den zum Starter gehörenden Zeichenfolgenregistrierungswert zu finden und ihn zu löschen. Dies soll den Konflikt beseitigen und es beiden Anwendungen ermöglichen, ordnungsgemäß auf demselben Computer zu funktionieren.
Hier ist eine Kurzanleitung zum Löschen des mit dem Uplay-Launcher verknüpften Registrierungswerts:
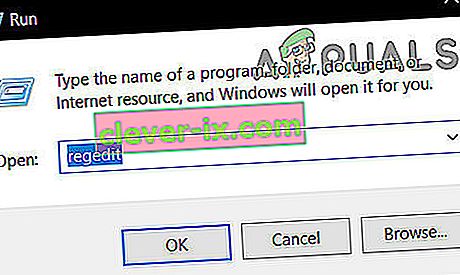
- Drücken Sie die Windows-Taste + R , um ein Dialogfeld Ausführen zu öffnen . Geben Sie in das Textfeld 'regedit' ein und drücken Sie die Eingabetaste , um den Registrierungseditor zu öffnen . Wenn Sie von der UAC- Eingabeaufforderung (User Account Control) dazu aufgefordert werden, geben Sie Yes ein , um Administratorrechte zu erteilen.
- Wenn Sie sich im Registrierungseditor befinden , navigieren Sie im linken Bereich des Fensters zum folgenden Speicherort:
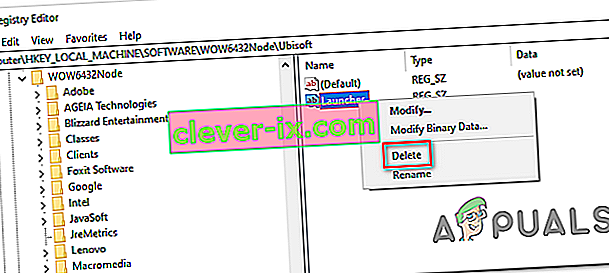
Computer \ HKEY_LOCAL_MACHINE \ SOFTWARE \ WOW6432Node \ Ubisoft
Hinweis: Sie können entweder manuell dorthin navigieren oder den Ort direkt in die Navigationsleiste oben einfügen und die Eingabetaste drücken , um sofort dorthin zu gelangen.
- Nachdem Sie an der richtigen Stelle gelandet sind, gehen Sie zum rechten Bereich des Bildschirms, klicken Sie mit der rechten Maustaste auf Launcher und wählen Sie Löschen , um ihn zu entfernen.
Hinweis: Falls Sie den Schlüssel löschen können, erfahren Sie hier, wie Sie den Besitz von Registrierungsschlüsseln übernehmen.
Hinweis: Nach dem Löschen muss der Launcher einen neuen Launcher-Zeichenfolgenwert mit neuen Daten erstellen, um das Problem zu beheben.
- Schließen Sie nach dem Löschen des Schlüssels den Registrierungseditor und starten Sie Ihren Computer neu.
- Wiederholen Sie beim nächsten Start des Computers die Aktion, die zuvor den Fehler " Eine nicht behandelte Win32-Ausnahme ist aufgetreten " verursacht hat, und prüfen Sie, ob das Problem behoben ist.


Wenn das gleiche Problem weiterhin besteht, fahren Sie mit dem nächsten potenziellen Fix fort.
Lösung 4: Setzen Sie den Internet Explorer zurück (falls zutreffend).
Eine weitere potenzielle Instanz mit dem Potenzial, dieses Problem zu verursachen, ist eine Reihe von beschädigten Internet Explorer (IE). Wenn die Fehlermeldung "In iexplore.exe ist eine nicht behandelte win32-Ausnahme aufgetreten" auftritt, wird sie wahrscheinlich nach einem fehlgeschlagenen Skript angezeigt.
To fix this issue, you should reset your Internet Explorer settings via the Internet Options menu. This operation was confirmed to be successful by a lot of users that were dealing with this error.
Here’s a quick guide on resetting Internet Explorer in order to resolve the “An unhandled win32 exception occurred‘ error:
- Ensure that Internet Explorer, Edge or any other associated instance is turned off and no background process is running.
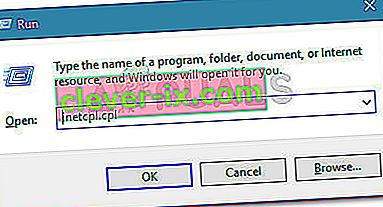
- Press Windows key + R to open up a Run dialog box. Inside the text box, type ‘inetcpl.cpl’ and press Enter to open up the Internet Options menu.
Note: If you are prompted by the UAC (User Account Control), click Yes to grant administrative privileges.
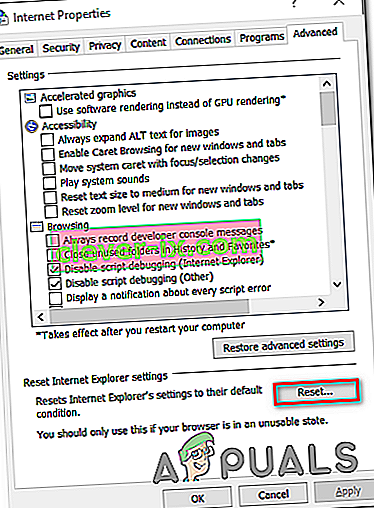
- After you manage to get inside the Internet Properties screen, select the Advanced tab from the horizontal menu at the top. Next, go to the Reset Internet Explorersettings and click on the Reset button.
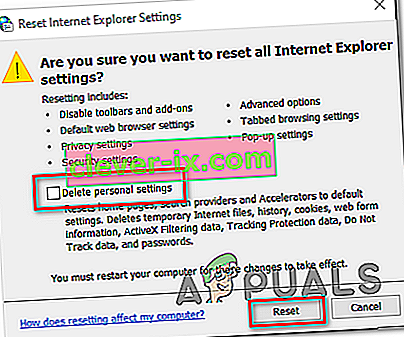
- Once you see the confirmation screen, ensure that the box associated with Delete personal settings is checked, then click on the Reset button.
- Wait until the operation is complete, then restart your machine and see if the issue is resolved at the next computer startup.


In case the same “An unhandled win32 exception occurred in iexplore.exe’ error is still occurring, move down to the next method below.
Solution 5: Disable Script Debugging and associated Registry Keys (if applicable)
If you’re encountering the issue with Internet Explorer on a machine that has VS installed on it, the issue can also occur due when Script Debugging is enabled and the registry entries end up containing corrupted data.
Several affected users that encountered this issue have confirmed that the issue was resolved after they accessed the Internet Options menu to disable Script Debugging and then deleted the associated keys using Registry Editor.
Here’s a quick guide on doing this in order to fix the “An unhandled win32 exception occurred in iexplorer.exe’ error:
- Press Windows key + R to open up a Run dialog box. Next, inside the text box, type ‘inetcpl.cpl’ and press Enter to open up the Internet Options menu. If you are prompted by the User Account Control (UAC), click Yes to grant administrative privileges.

- Once you manage to find yourself inside the Internet Properties screen, use the menu at the top to select the Advanced tab.
- Inside the Internet Properties screen, scroll down through the Settings menu and check the box associated with Disable script debugging (Internet Explorer).
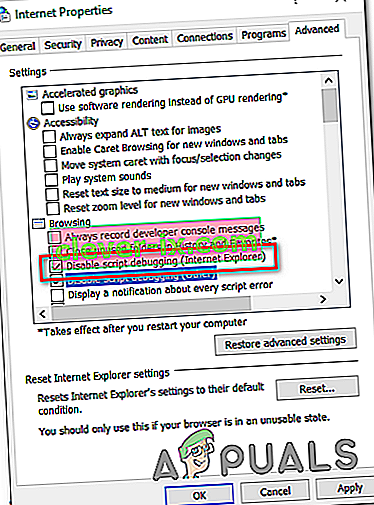
- Once the modification is enforced, hit Apply to save the changes, then close the Internet Properties window.
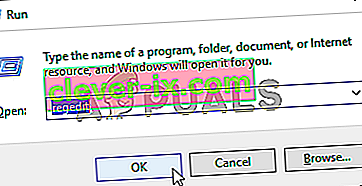
- Press Windows key + R once again to open up another dialog box. This time, type ‘regedit’ and press Enter to open up Registry Editor. You will need to grant admin access, so click Yes when prompted by the User Account Control window.
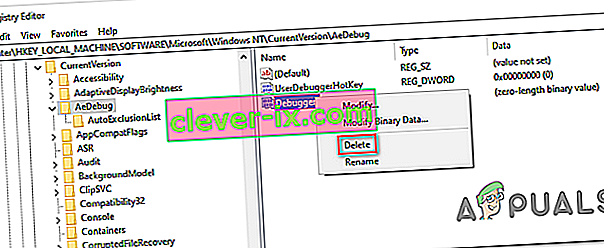
- Inside the Registry Editor, navigate to the following location using the left-hand menu:
HKEY_LOCAL_MACHINE\SOFTWARE\Microsoft\Windows NT\CurrentVersion\AeDebug (32 - Bit Machine) HKEY_LOCAL_MACHINE\SOFTWARE\Wow6432Node\Microsoft\Windows NT\CurrentVersion\AeDebug (64 - Bit Machine)
Note: The location of the file we need to delete is different depending on the Windows version that you’re using. If you have a 32 – bit Windows version use the first location, else, use the second.
- Once you arrive to the correct location, move down to the right-section, right-click on Debugger and choose Delete from the context menu.
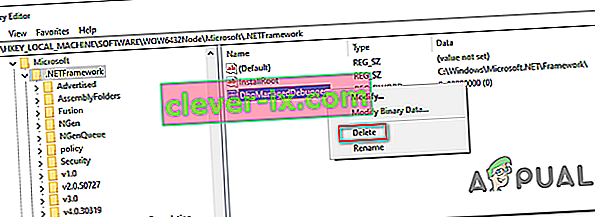
- Once this key is deleted, navigate to this second location:
HKEY_LOCAL_MACHINE\SOFTWARE\Microsoft\.NETFramework\ (32 - Bit Machine) HKEY_LOCAL_MACHINE\SOFTWARE\Wow6432Node\Microsoft\.NETFramework (64 - Bit Machine)
Note: Access the registry key associated with your Windows bit version that you’re using.
- When you arrive at the correct location, move over to the right-hand section and delete the DbgManagedDebugger value by right-clicking on it and choosing Delete from the context menu.
- After you manage to delete the value, close the Registry Editor and restart your computer.
- Once the next startup is complete, see if the same issue is still occurring.


In case the “An unhandled win32 exception occurred’ error is still occurring, move down to the next method below.
Solution 6: Install the Latest Version of NET Framework and Repair it
Having NET Framework installed on your computer is vital and plenty of modern games and programs depend on you having it installed. Before repairing it, follow the steps below in order to install the latest version on your computer.
Navigate to this link and click the red download button in order to download the latest version of the Microsoft .NET Framework. After the download has finished, locate the file you downloaded and run it. Note that you will need to have constant access to the Internet. Follow the instructions on-screen to proceed with the installation.
- After installing the latest version, it’s time to check its integrity. On your keyboard, use the Windows Key + R key combination to open the Run dialog box.
- Type in control.exe and click OK in order to open it.

- Click the Uninstall a Program option and click Turn Windows features on or off. Make sure you locate the .NET Framework 4.x.x entry and make sure it’s enabled. ‘x.x’ marks the latest version available for your operating system.
- If the checkbox next to .NET Framework 4.x.x is not enabled, enable it by clicking the box. Click OK to close the Windows Feature window and reboot the computer.

- If .Net Framework 4.x.x is already enabled, you can repair .Net Framework by clearing the box and rebooting the computer. After the computer has restarted, re-enable .Net Framework and restart the computer again.
Solution 7: Perform a Clean Boot
There are various other programs and services which can affect the proper functionality of the Microsoft .NET Framework suite. In most cases, the cause is the antivirus you have installed and you can try disabling it to see if the error persists. However, to make sure nothing can interfere with the installation, we recommend you perform a clean boot which will disable all non-Microsoft programs and services from starting up. This way, you can easily deduct just which program causes this error to happen!
- Use the Windows + R key combination on your keyboard. In the Run dialog box type MSCONFIG and click OK.
- Click on the Boot tab and uncheck the Safe Boot option (if checked).

- Under the General tab in the same window, click to select the Selective startup option, and then click to clear the Load startup items check box to make sure it’s not checked.
- Under the Services tab, click to select the Hide all Microsoft services check box, and then click Disable all.

- On the Startup tab, click Open Task Manager. In the Task Manager window under the Startup tab, right click on each startup item which is enabled and select Disable.

- After this, you will need to perform some of the most boring processes and that is enabling the Startup items one by one and restarting your computer. After that, you need to check whether the problem appears again. You will need to repeat the same process even for the Services which you have disabled in Step 4.
- Once you locate the problematic startup item or service, you can undertake action in order to solve the problem. If it is a program, you can reinstall it or repair If it is a service, you can disable it, etc.
Solution 8: Use SFC to Scan for Memory Leaks
It has been reported that the Microsoft .NET Framework corruption is related to faulty system files. These problems are rooted deep inside the system files and the only way to try to resolve them is by running the System File Checker (SFC). It will scan your system files for errors and possible repair or replace them. Follow the steps below in order to do so!
- Search for “Command Prompt” by typing it either right in the Start menu or by pressing the search button right next to it. Right-click the first entry which will pop up as a search result and select the “Run as administrator” context menu entry.
- Additionally, you can also use the Windows Logo Key + R key combination in order to bring up the Run dialog box. Type in “cmd” in the dialog box which appears and use the Ctrl + Shift + Enter key combination for admin Command Prompt.

- Type in the following commands in the window and make sure you press Enter after typing each one. Wait for the “Operation completed successfully” message or something similar to know that the method worked.
sfc /scannow
- Try to restart your computer and check to see if the Unhandled Exception has Occurred in your Application error continues to appear on your computer.
Solution 9: Performing a Clean Install
If none of the methods presented below have managed to help you in resolving the issue, it’s very likely that you’re dealing with some kind of Windows inconsistency that cannot be resolved conventionally.
If this scenario is applicable, you should be able to fix the issue by resetting every component associated with your Windows installation. If you want to go this route, you have two ways forward. It all boils down to the procedure that you want to follow:
- Repair install (in-place repair) – This procedure is the best approach when you need to refresh every OS component, but some users might end up considering it a little too tedious for their taste. Keep in mind that you will need a compatible installation media in order to enforce this fix, but the major advantage is that all your personal data (including games, applications and personal media) will be preserved even if you don’t back up your computer.
- Clean install – If you’re looking for the simplest solution, this is the way to go. You will not need an installation media to enforce it (it’s all done through the Windows GUI). But unless you back up your data in advance, be prepared for total data loss.


